Choose one sound with a job
Start small enough to finish: a desk bell, muted guitar harmonic, thumb piano, bowed glass, or one synth patch you made. Record a quiet room tone, then capture a stable note at three or four pitches across the useful range. Leave a second of silence before each note and enough decay after it to hear the true tail. Your first instrument does not need to cover every key and velocity. It needs a deliberate sound and an obvious performance range.
Name files by what they are: bell_C3_soft.wav, bell_F3_soft.wav, bell_C4_soft.wav. Write the played pitch while recording. Guessing root notes later turns mapping into archaeology. If pitch is ambiguous, use a tuner or compare against a reference tone, then note the uncertainty rather than forcing an exact label.
Map pitches around their root keys
A root key tells the sampler where a recording should play at its natural pitch. Give each recording a narrow initial territory—perhaps two or three semitones either side—then play a chromatic scale and listen for the places where transposition becomes implausible. Ableton’s Sampler documentation explains that key zones determine which MIDI notes trigger a layer, and that samples recorded at particular root keys can cover nearby notes before additional samples are needed. This is the core of a small multisample: trade a few well-chosen recordings for credible range.
Do not auto-spread every sample across the keyboard and call the result an instrument. Use gaps only if silence is musically useful; otherwise make zones meet at a sensible midpoint. If neighbouring samples change colour abruptly, try a zone crossfade or record another pitch. A discontinuity is useful feedback about the source, not a failure of the sampler.
Loop sustains with restraint
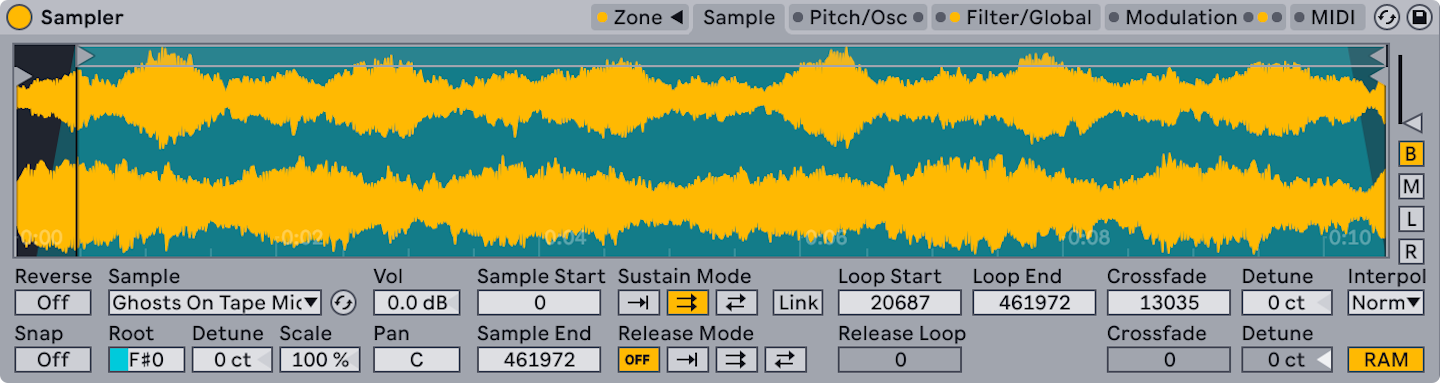
For a sustained sound, find a stable middle section after the attack and before the natural decay becomes important. Create a loop there, audition held notes for ten seconds, and listen for a pulse or obvious restart. A short crossfade can hide a small mismatch, but it cannot make a vibrating object perfectly stationary. If the loop sounds synthetic in an interesting way, keep it as a design choice; if it sounds accidental, use the unlooped decay or rerecord.
Ableton’s current Sampler reference exposes loop start, loop end, crossfade, and root-key controls in the Sample tab. Those controls are tools for a performance decision, not an instruction to loop every source. Keep your raw recordings outside the instrument preset so you can return to them when a later edit is better made at the source.
Exercise: a five-note playable object
Make an instrument from five recordings of one object. Map them across one octave, assign root keys, and create one velocity layer only. Program a slow scale, a chord, and a short melody. Note where the instrument is convincing and where it exposes a bad zone or loop. Fix one issue by recording, not processing. The payoff is a personal instrument with audible authorship and practical limitations you understand, rather than a generic preset pretending to be infinitely flexible.
Continue in Session craft, or A 1983 protocol let rival instrument makers speak one language.
Evidence & further reading
Go to the source.
Primary references checked 19 September 2026. Practical exercises are editorial guidance, not reported product tests.
- Live Instrument Reference: Sampler ↗
Sampler offers key, velocity, and sample-select zones plus root-key and loop controls.
Ableton · Accessed 2026-09-19 - How To: Multisampling with Sampler ↗
Ableton documents a workflow for placing samples in Sampler and adjusting key-zone boundaries.
Ableton · Accessed 2026-09-19