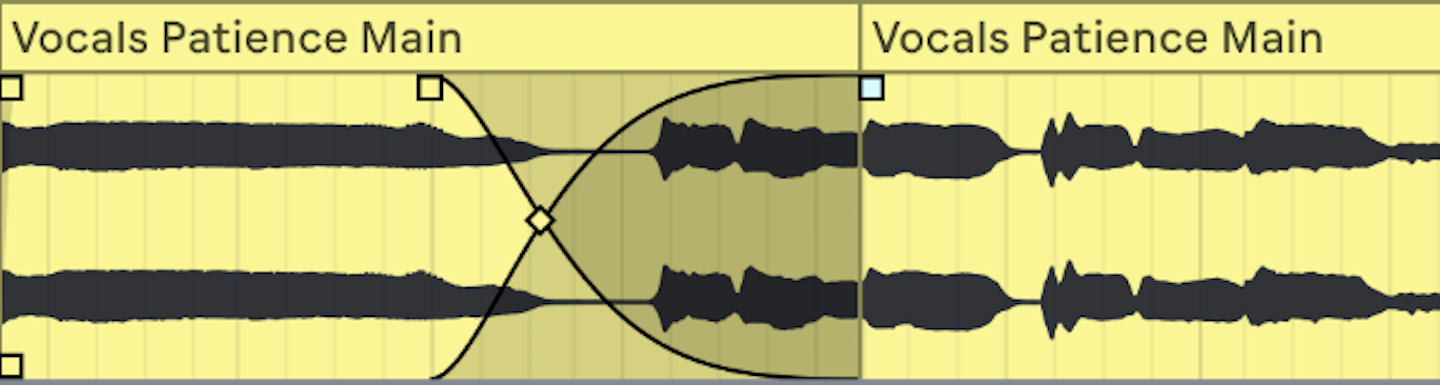
Hear the boundary, not the whole loop
Put the loop on repeat, reduce monitoring level, and listen only to the last half-second flowing into the first half-second. A click often means the waveform jumps abruptly at the edit. A bump can mean both sides contain low-frequency energy that does not meet cleanly. A breathless or chopped feeling is usually a tail problem: reverb, cymbal wash, room tone, or a sustained note was cut as the loop restarted. Label the symptom first; a crossfade applied to every problem can blur transients while leaving the actual timing error untouched.
Temporarily bypass beat-sync or warping while you inspect the original file. If the seam is clean unwarped and ugly in time-stretched playback, the problem is likely the stretching mode or marker placement, not the source boundary. Ableton’s manual describes warping as timing adjustment without necessarily changing pitch; it also makes the useful distinction between rhythmic material and non-rhythmic samples. Treat those as different repairs.
Find a musically honest start
For drums, begin by checking bar length and the first downbeat. Trim so the loop contains a complete rhythmic cycle, then zoom in to look for a nearby zero crossing only after the bar is correct. Moving a kick off its intended grid just to land on a zero crossing trades a tiny click for a larger groove problem. Use a very short fade or edit a few samples around the boundary instead. For a pitched drone, find a stable portion of the waveform and use a slightly longer crossfade so the spectrum has time to blend.
If a loop includes a decay, do not make it pretend there is no decay. Extend the source with a copied tail, create a small overlapping crossfade, or print a separate tail that runs over the next repetition. For a four-bar pad, an eighth-note overlap may be more truthful than a hard four-bar box. Keep the loop’s timing anchor intact and solve the continuity around it.
Test the repair at three scales
First, audition the seam in solo. Second, play eight or sixteen repetitions; a one-time acceptable fade can turn into a pulsing modulation when repeated. Third, put it back against the kick and bass. A seam that disappears in solo may create a low-end flutter when summed with the arrangement. Do not normalize or compress the loop before diagnosing the boundary, because that can exaggerate the click and hide its location.
In a clip-based DAW, set the loop position and length numerically once you know them. Ableton’s Clip View documentation notes that a warped audio clip can have its loop brace positioned and sized precisely. Exact values make your repair repeatable and protect it when the project grid changes later.
Exercise: repair three different failures
Make three eight-bar test loops from your own material: a drum break with an abrupt cut, a pad with a missing reverb tail, and a guitar phrase that starts slightly before the grid. Repair each with a different method: microfade, overlap/tail, and timing correction. Bounce eight repetitions of each, then blind-listen without watching the screen. Write which method fixed continuity without changing the musical attack. The useful payoff is not a universal ‘seamless loop’ recipe; it is the ability to hear whether the fault belongs to the edit, the bar math, the tail, or the time-stretching.
Continue in Session craft, or Live 12 put MIDI generators and a neural sound search in the browser.
Evidence & further reading
Go to the source.
Primary references checked 19 September 2026. Practical exercises are editorial guidance, not reported product tests.
- Audio Clips, Tempo, and Warping ↗
Warping synchronizes rhythmic audio and offers different behavior for unwarped and warped clips.
Ableton · Accessed 2026-09-19 - Clip View ↗
Loop position and length can be set precisely in the clip editor.
Ableton · Accessed 2026-09-19